Configuring your Mobile App and Mobile Service in OpenShift
-
Mobile Services is running as described in Setting up AeroGear Mobile Services on OpenShift
Registering a Mobile App
After provisioning Mobile Developer Console, the next step is to register the Mobile App that you are going to develop.
To create a Mobile App:
-
Log into the OpenShift console.
-
Choose project where you have previously deployed Mobile Developer Console.
-
Open Mobile Developer Console by clicking on its route in the Overview screen.
-
Log into the Mobile Developer Console.
-
Click on
Create Mobile Appbutton. -
Enter a name for your Mobile App.
-
Click
Createbutton.
Provisioning your First Service
Mobile Services provide commonly required features for mobile app development.
This section introduces the procedures for using Mobile Services by guiding you through the process using the Identity Management service. For a full list of available services, see Mobile Services
To provision the Identity Management mobile service:
-
Log into the OpenShift console.
-
Choose a project where you have previously provisioned Mobile Developer Console.
-
Select Catalog from the left hand menu.
You can filter the catalog items to only show mobile specific items by selecting the Mobile tab.
-
Choose the Identity Management service.
-
Follow the wizard for provisioning that service.
If prompted to Create a Binding, choose Do not bind at this time.
| When completing the Identity Management provisioning wizard, you are prompted to enter configuration data. For the purposes of this guide, keep the default values. For more information about the Identity Management provisioning wizard fields, see Identity Management Configuration. |
Once the wizard steps are completed, navigate to the Project Overview in OpenShift to see the newly provisioned service. Provisioning a service may take some time.
Additional resources
Identity Management Configuration
-
Keycloak admin username: Username for Keycloak administration
-
Keycloak admin password: Password for the Keycloak admin user
-
Name of the Keycloak realm: Name of the keycloak realm. (defaults to current namespace)
| A realm manages a set of users, credentials, roles, and groups. A user belongs to and logs into a realm. Realms are isolated from one another and can only manage and authenticate the users that they control. |
-
Connect to an existing shared service: Select if you want to use an existing service and you have the URL and credentials to use that service.
-
URL of the shared service: Enter a value if you want to use an existing shared service.
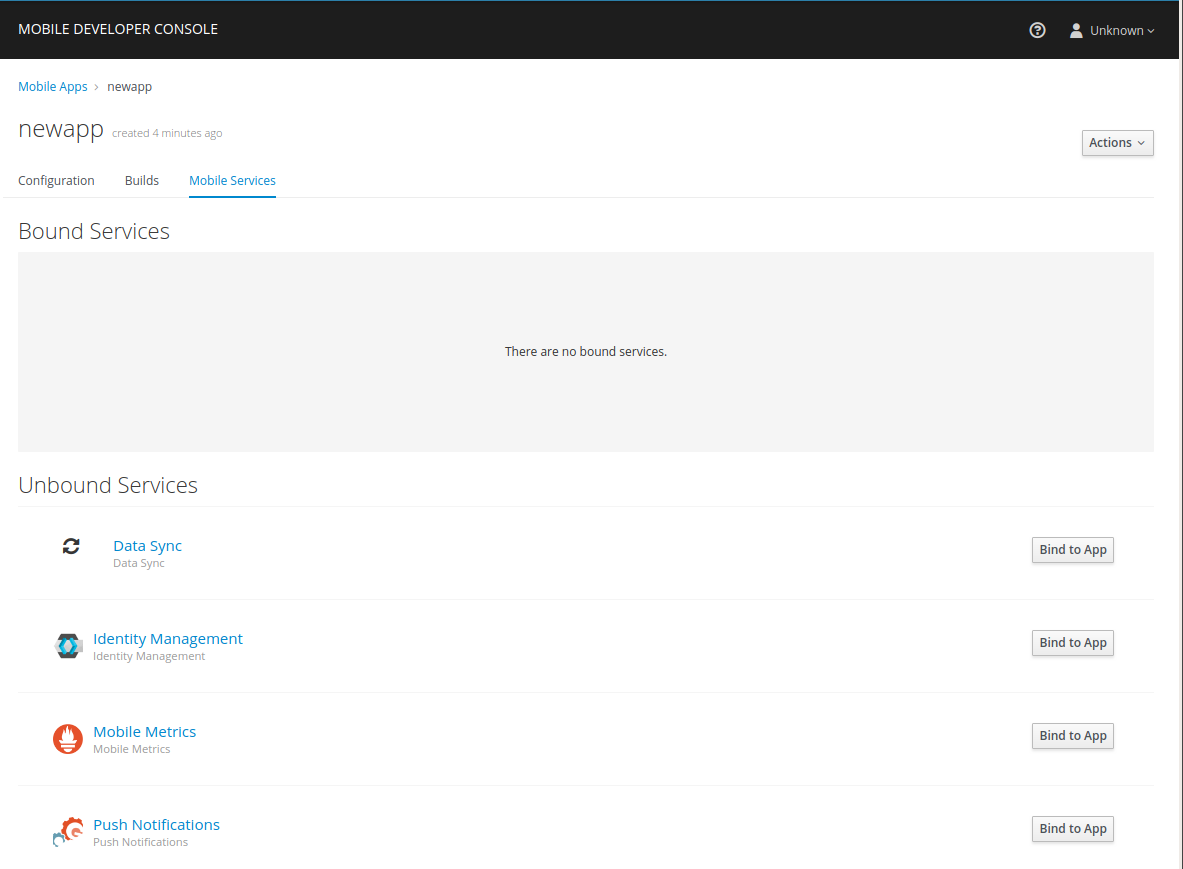
Binding a Mobile App with the Identity Management Service
To use mobile services, you must represent your mobile app in Mobile Developer Console, and that app must be associated with the mobile service. This association is called binding and it is necessary for your mobile app to use that service.
To bind a Mobile App with a mobile service:
-
Launch Mobile Developer Console
-
Click on the Mobile App on the Overview screen
-
Navigate to Mobile Services tab.
It is possible to bind a Mobile App with a mobile service in the OpenShift console, however such bindings are not valid for the purposes of this procedure. -
Press Bind to App in the Identity Management
-
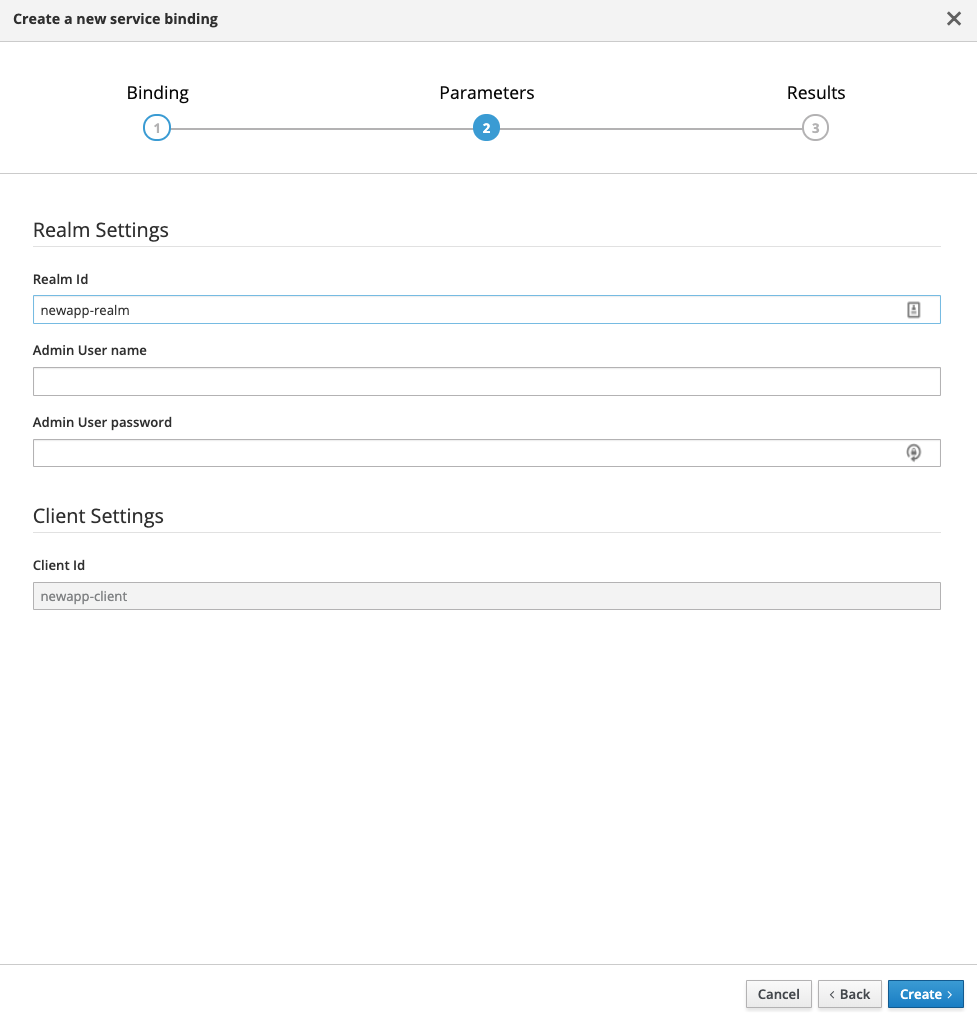
Fill out the binding parameters required by the Identity Management Service.
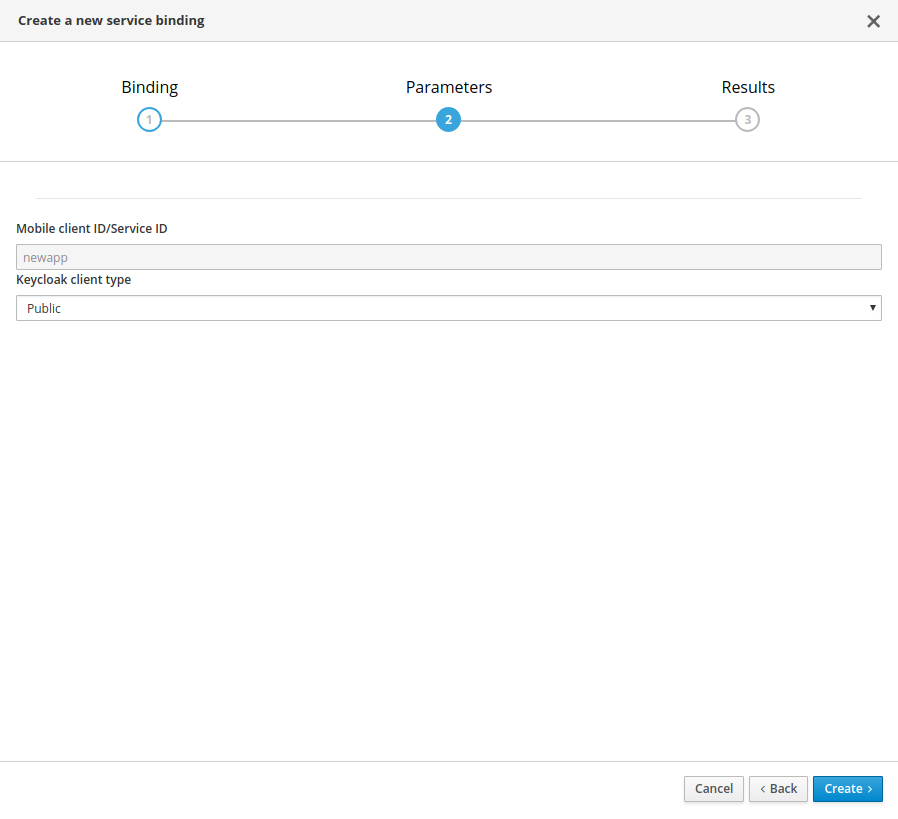
Use Public when binding a Mobile App to Mobile Metrics. When binding mobile services to each other, use Bearer.
|
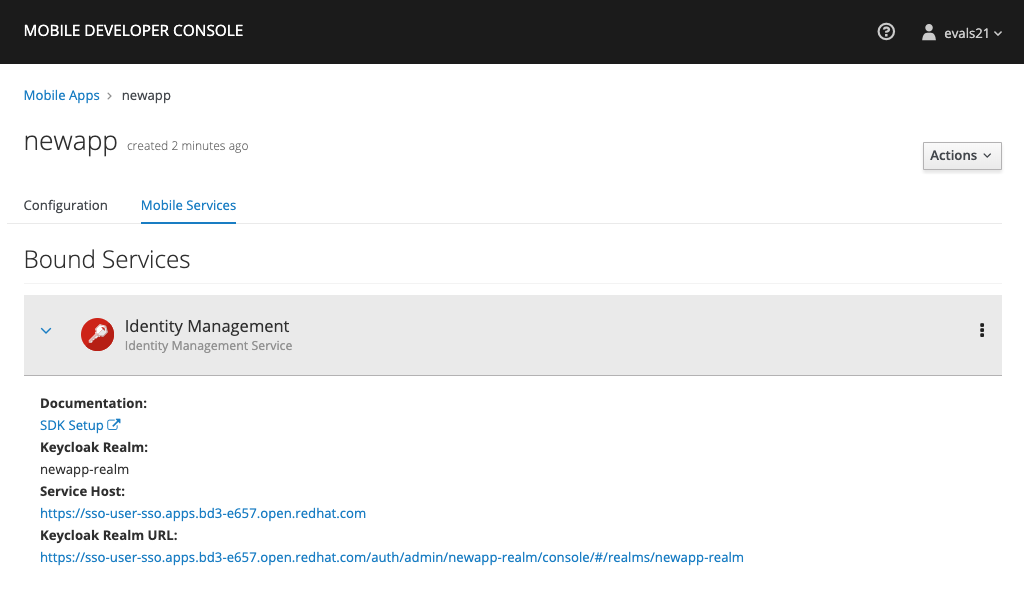
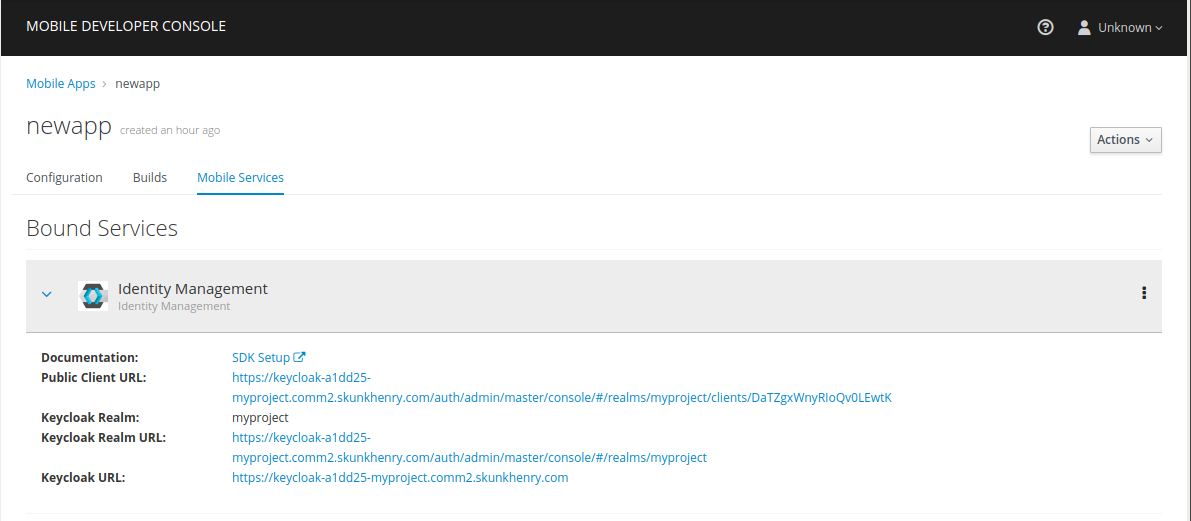
The Identity Management service will now be expandable, details about the service can be viewed.
Configuring the Service
The following section will guide you through configuring the schema of the redirect url and web origin for a client in Keycloak. This is required to enable OpenID authentication. For an explanation of these terms, see Keycloak Documentation.
Configuring Keycloak
-
Log into the Mobile Developer Console and navigate to the Mobile App screen.
-
Select the Mobile Services tab and if a spinning icon is displayed to the right of the Identity Management entry, wait for the binding process to complete.
-
If the Keycloak Realm URL URL is not visible, expand the Identity Management Service by clicking the > icon.
-
Click on the Keycloak Realm URL link to open the Keycloak Administration Console.
-
Log in to the Administration console using the credentials you specified when Provisioning the service (defaults to admin/admin).
-
Log in to the Administration console (default admin/admin).
-
Select Clients from the left navigation menu.
-
Select your client from the list of clients. The name of your client is derived from the name of the Mobile App, the name of the mobile development platform and the client type, for example
myapp-android-public. -
Add an additional entry to the Valid Redirect URIs input field.
It is recommended to use the package name of the Android app as the schema of the redirect url to avoid conflicts. (e.g.
com.aerogear.androidshowcase)It is recommended to use the Bundle Identifier of the iOS app as the schema of the redirect url. (e.g.
org.aerogear.ios-showcase-template)Set the additional value to
http://localhost*.Depending on the platform, set the redirect URL as described in either the Android or the iOS tab.
-
Add an additional entry to Web Origins.
Use the package name of the Android app to avoid conflicts, for example,
com.aerogear.androidshowcase.Use the Bundle Identifier of the iOS app, for example,
org.aerogear.ios-showcase-template.Set the additional value to
http://localhost*.Depending on the target platform, set the additional value as described in either the Android or the iOS tab.
-
Save your changes.
-
Create a new user account as described in Creating a New User.
-
Create credentials for the new user as described in User Credentials.
-
Configure the AeroGear showcase app for your mobile platform (Android, iOS, Cordova or Xamarin)
-
Run the showcase app and make calls to the Identity Management service